Showing posts with label Paper craft. Show all posts

Sunday, September 27, 2009

Poppy Flowers


Materials
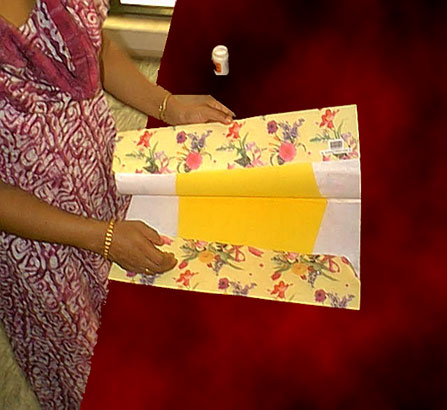
  • Crepe Paper (red and Golden yellow)
  • Black cloth
  • Cotton
  • Stem Wire
  • Green Tape
  • Thread
Procedure

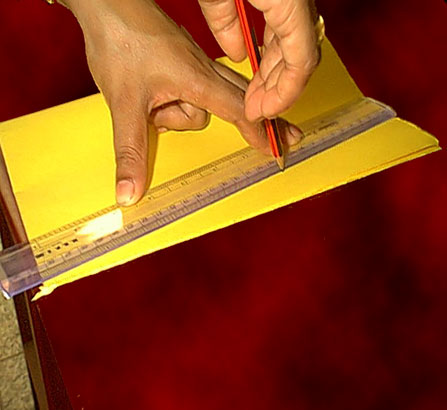
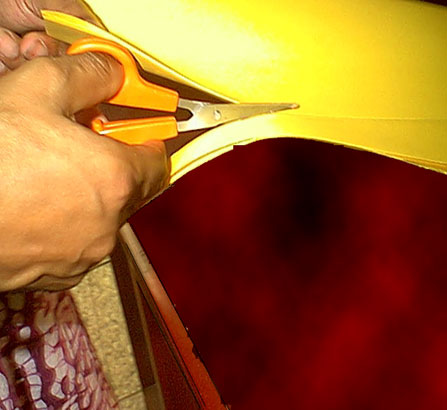
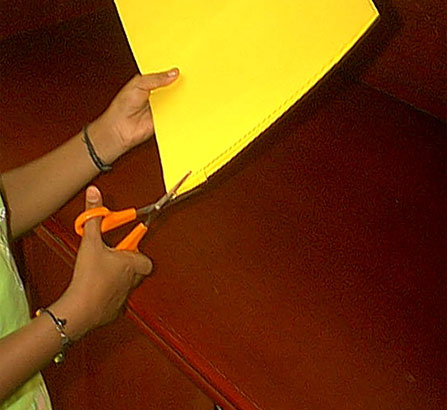
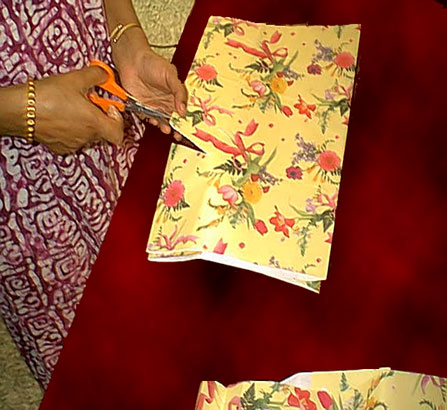
  • Cut red crepe paper for petals as shown in figure (4 or 5 pieces for each flower). 
  • Make the centre of the flower by wrapping a ball of cotton with black cloth and tying it with a thread. Attach  a stem wire by twisting the wire at the bottom of the center.
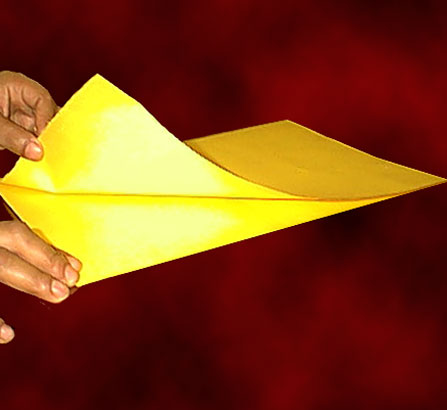
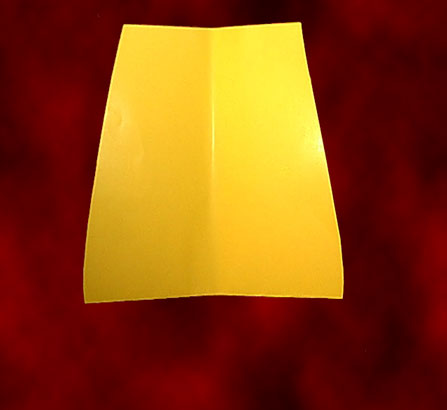
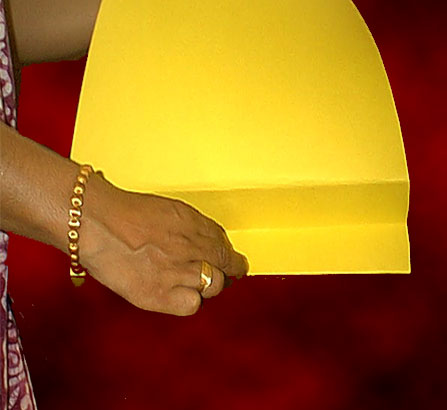
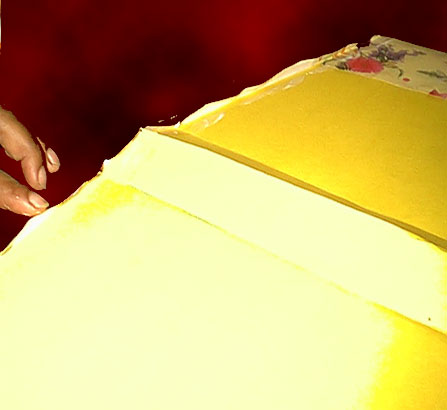
  • Take a strip of golden yellow crepe paper and cut its edges 1/4 " to the centre of the strip.
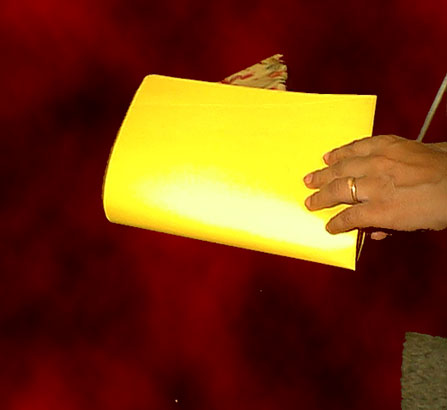
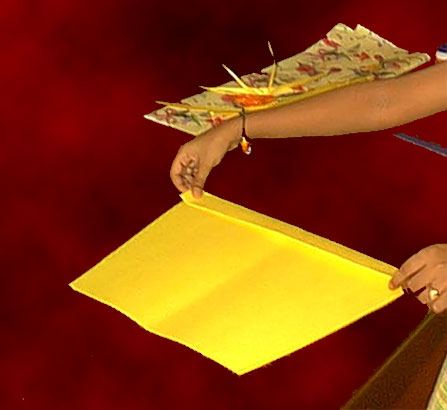
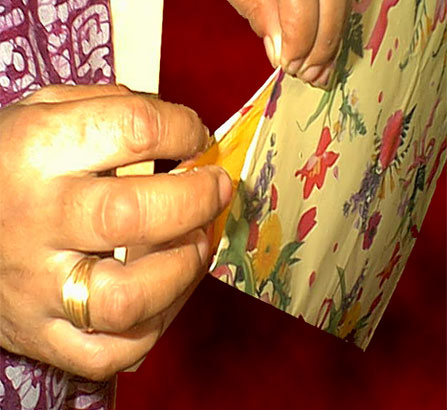
  • Wind the strip around the flower centre and tie it with a thread as shown in the picture gallery.
  • After creping (crumbling) the petals by Handkerchief method, fix petals to the centre using thread.
  •  Wrap the stem with green tape.


Flower Centre

Handkerchief method Step1


Now your flower is ready, arrange with fresh or artificial leaves


Handkerchief method
Cut the petal and fold in half lengthwise. Place it inside a handkerchief or other light material . Using the palm of one hand to hold the base of the petals, the cloth is pulled firmly away from the centre crease.


u get many more from here...

Saturday, September 26, 2009

Beautiful Crape Paper Flowers

Ingredients:


Aluminum string


Crape


Cotton bend


Green tape


Method:
Take aluminum string. Cut it into length of 10cm.now take a crape and cut it in petal shape. Each should have 5 petals in the same length. Now pull the paper the edges with help of scissors i.e., your thumb should be on the paper and scissors at the back of the paper now pull it. You will get nice petal shape. Now take cotton bend the wire like hook shape at the tip. Keep cotton on top of bend wire and tie. Now keep the crape paper at this tip slowly crush the edge and rotate and bring to flower shape. Then tie it with string. Later cover it with green tape. Your flower is ready.

Crushed Paper Collage


Materials Need :
›     Smooth Crape papers in different co lour
›     Board
›     Gum
›     Bead
›     Poster Co lours


Method :

First draw any picture on the board(eg.Fish, Butterfly) and then cut the Smooth Crape papers into small squares and then crush each squares like small rounds. stick those rounds in the design. If it is a fish stick a bead for the eye. Then co lour the background with poster co lours.


u get many more from here...

Friday, September 25, 2009

Small projects-Hat

Hat

Materials
  • Chart paper or any thick paper - 2 sheets any colour
  • Glue
  • Scissors
  • Pencil
Procedure:
Draw two circles, one 24cm in diameter and another 19cm in diameter one inside the other. Cut out the larger circle.
Cut fringe's along the outer circle till they end at the inner circle. Fold the fringe's down. Keep it aside.

Cut out a long strip from the sheet of the same colour measuring 8cm in breadth and 60cm in length. Draw a straight line down the centre of the strip and carefully cut fringe's down one half.
Apply glue to the strip and then fix it to the circle by sticking the un-fringed portion of the strip over the fringes of the circle. Fold the fringe's outwards.
Again draw two circles of diameters 30cm and 19cm in another sheet of chart paper and cut out a ring from it.
Place the ring over the top of the hat and onto the outturned fringes and glue it in place.
As decoration you can stick a band of any suitable wrapping paper around the top edge of the hat.

 u get many more from here...

Book Making

Gift Book

Materials Required : 
  • Writing Paper - 1 piece (22cm x 28cm)
  • Thick Decorative Cover Paper - 1 piece (7.5cm x 38cm)
  • Big Needle
  • Thick Thread
  • Ruler
  • Pencil
  • Paper Clamps
Making : 
1.    Cut the writing paper into six pieces, each 14cm x 7cm. Fold each piece in half widthwise. Make the folds crisp by pressing them firmly. Put one folded page inside another, until they are all in level.
2.    Rule lines on the back of the cover paper at 7.5cm, 15cm, 23cm and 30 cm from one end. Fold the paper along these lines.
3.    Place the prepared folded paper on the first fold on the good side of the decorative cover paper. Leave a 0.25cm margin at the top and bottom. Clamp it in place.
4.    Using the needle, make three holes on the wrong side of the cover paper along the folded edge at 2cm, 4cm and 6cm from the top edge. The holes should go right through the writing papers.
5.    Double thread the needle with 40cm of the thread. Make a knot about 7.5 cm from the end. First, bring the needle through the middle hole from the back side. Pull the thread until you reach the knot. Then go through the top hole from the front to the back, gently pulling the thread tight. Skip down to go through the bottom hole, then finish by going through the center hole from front to back and ending up where you started. Gently pull the thread tight and knot the ends together. Trim the excess thread.

6.    Unfold the folded parts (right side) of decorative book cover paper and fold it back over itself covering the knotted thread. Tuck the last flap around the first. The edge of the last flap should touch the inside middle of the book. Make the folds crisp by pressing them firmly.  If you want you can stick the last flap with glue to keep it in place.

Paper Bag


Paper Bag

Materials :
  • Chart paper
  • Gift Wrap
  • Glue (Fevicol)
  • Thick Thread
  • Scissors
  • Ruler
Click on the pictures for an enlarged version
bag8.jpg (44422 bytes)
bag02.jpg (20817 bytes)
bag18.jpg (19708 bytes)
Materials
Cut a rectangular piece and fold it
Fold it again to make a four fold
bag21.jpg (32749 bytes)
bag16.jpg (33839 bytes)
bag11.jpg (15258 bytes)
Draw a slanting line
Cut through the slanting line
Shape of the paper after cutting
bag17.jpg (26333 bytes)
bag20.jpg (24554 bytes)
bag19.jpg (38217 bytes)
Fold 1 inch of the broader side
Unfold and turn it over, then make a zig zag fold
Level the sides, cutting off  the extra pieces
bag1.jpg (21242 bytes)
bag4.jpg (43193 bytes)
bag3.jpg (53411 bytes)
Stick the chart paper on the wrong side of the gift wrap
Fold the top side of the gift wrap inside
Cut it in the shape of chart paper after leaving 1/2 inches
bag2.jpg (20368 bytes)
bag6.jpg (47806 bytes)
bag7.jpg (45886 bytes)
Apply glue on both sides and stick the 1/2 inch piece inside the chart paper to have a finishing look
Stick open sides together
Punch two holes to fix the handle
bag24.jpg (47395 bytes)

bag.jpg (40892 bytes)
Insert thick thread through the hole and tie it in place

Final Product

Wednesday, September 23, 2009

Papermaking


After reading about paper making, and seeing the deckles, screens, and vats that were used in the process; I thought there was no way for me to make paper. I live in a small apartment in the city. I simply don't have room to store the supplies, or hang a line for the paper to dry.
I am so glad I happened to find the Papyrus paper making kit, while shopping for art supplies. The Papyrus paper making kit makes postcard sized sheets of paper. (Ideal for note cards, collage, scrapbooking, or binding into handmade books.) The kit is simple to use, and small for storage purposes. It comes with a variety of textured screens to use for papermaking.
While I am still relatively new to papermaking, I have found that brightly colored greeting card envelopes make great recycled paper! I have posted a short tutorial, below.

Making Paper from Recycled Envelopes:


supplies:
    - Papyrus paper making kit (or similar kit)
    - used greeting card envelopes (any size or color will do)
    - blender OR empty plastic bottle with cap
        (single serving 9 oz. water bottle will do)
    - water
    - old newspapers, old towels, paper towels
        (any or all of these)
    - a flat area where the paper can dry overnight undisturbed


One regular sized greeting card envelope generally makes 2 postcard sized sheets of paper.
The first step is to shred your envelope. I simply tear the envelope into tiny pieces. You may also cut it into tiny pieces using scissors, or run it through a shredder. When you have shredded up your envelope, place the pieces into your blender along with enough water that the paper moves freely. Blend until the paper has completely broken down.
If you do not have a blender, you may use a somewhat old-fashioned method called "shaking". Why not burn a few calories while pulping your paper? Put your shredded paper into your bottle and add water to fill your bottle about 3/4 full. Give it a little shake & then let the paper soak. Pick it up every now & then and shake it for awhile. I tend to have several bottles of different colored papers soaking at any given time. I keep them next to my computer, so that when I am waiting for something to download -or- reading an article, I pick up the bottles and shake them. It usually take a couple of days to break down into pulp this way, however.. there really is no rush.
If you have the Papyrus papermaking kit, simply follow the instructions from number 4 onward, just as if you were making paper from the pulp included with the kit.
If you are using another type of kit, or a handmade screen and deckle - here are some general instructions. Set your deckle with screen into your vat. Pour your paper pulp evenly over your screen. You may use your fingers to spread it out, if need be. Place your second screen on top and lift up from your vat. Press the screens together to remove as much water as possible.
Blot the screens between layers of toweling (or newspapers, or paper towels) to remove as much water as possible. Remove the screen that is attached to the deckle - or largest frame. Spread a cloth or paper towel over the wet paper, apply some pressure and flip it over. Gently remove the second screen. (If you stretch or tear the paper, you may break it up and put it back into your bottle - add water & shake up to reuse immediately.)
Flip the cloth or toweling, so that the wet paper is on your countertop, or other flat surface for drying. Gently peel off the cloth or toweling and let the paper dry overnight. The paper will shrink slightly as it dries, and the color will become lighter. If your paper curls at all during the drying, you may press it between heavy books, or iron it as needed.

Tips:

If you find that you are tearing your sheets when you remove them from the screens, experiment with thicker paper -or- use more pressure to squeeze water out of your pulp when between the screens.
After pulping or blending your paper, you may stir in a number of different things to create a wide variety of papers. Try glitter, or bits of thread, or leaves, or flower petals. There is no limit to what you can create.


u get many more from here...

Teachers' Gifts


Teachers' Gifts
 
Teachers' Gifts
Beaded and embellished, under-a-dollar, back-to-school treats
A Kreinik website design by
Discount Diva
Perhaps you're like me: there are times when you want to do something more than sending a card, but less than spending a fortune. I love surprising people with little gifts, but my budget isn't always prepared for it. This is where handmade gifts fit in perfectly. It IS the thought that counts, but giving a gift that looks expensive is nice too. Whenever I want something that looks like it came from a specialty boutique, I ask, "What can I embellish with Kreinik beads, tape and threads?"
Materials needed:
  • purchased blank books
  • sheet of Treasure It® Treasure Tape red-liner double-stick tape
  • Treasure It® Diamond Beadlets®
  • Mrs. K's Dimensional Threads, #12 braid, in colors to match your project
  • wax paper, scissors, pan or tray
Instructions:
Click here to download the instructions for this project.
You will need the Adobe Reader to view and print this file. If you have trouble downloading this file and would like us to send you a printed copy send a #10 SASE to: Teachers' Gifts, P.O. Box 1258, Parkersburg, WV 26102.


u get many more from here...

Thursday, September 3, 2009