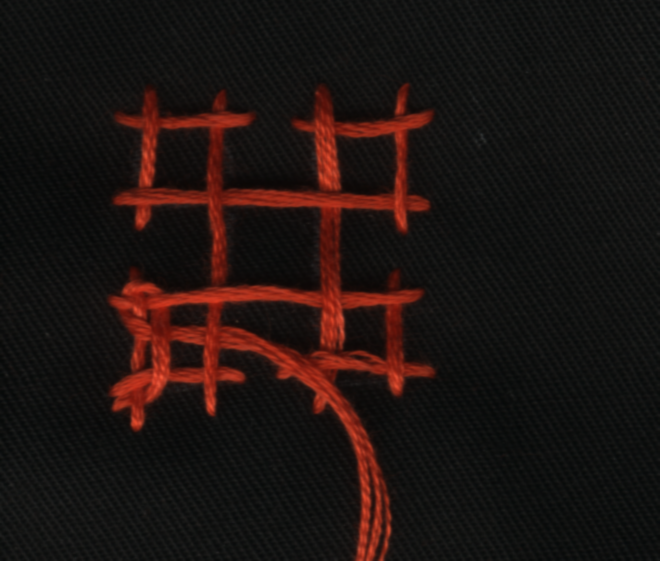
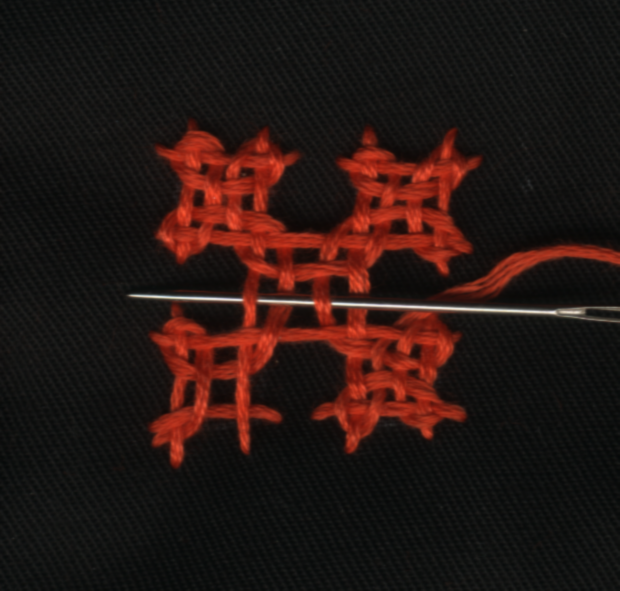
Make sure the Foundation or skeleton has been laid correctly before starting the interlacing.
I have named the lines formed by the interlacing only for discussion sake.

Bring the needle up between 1 and 24.
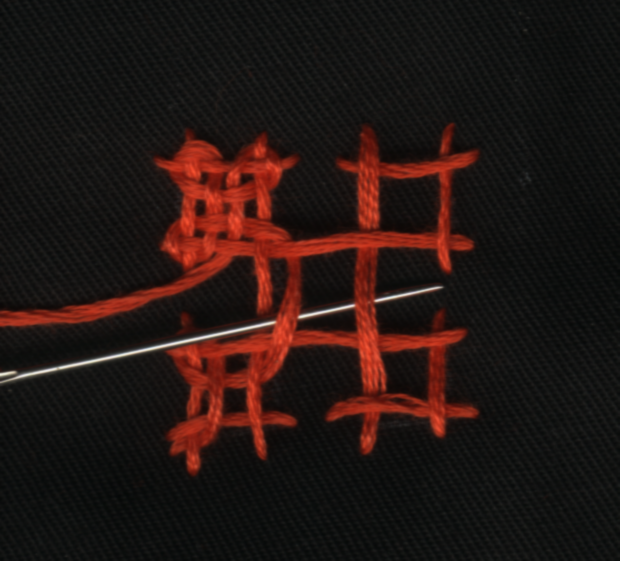
Pass the needle
Under 24 over line A
Under line K (line L1 formed) over 23
Under 22 (around corner) over line over L
Under L1
Under B (line K1 formed) over K (interlacing the intersection)
Only half of square I has been interlaced. We now move from square I to square II through square V
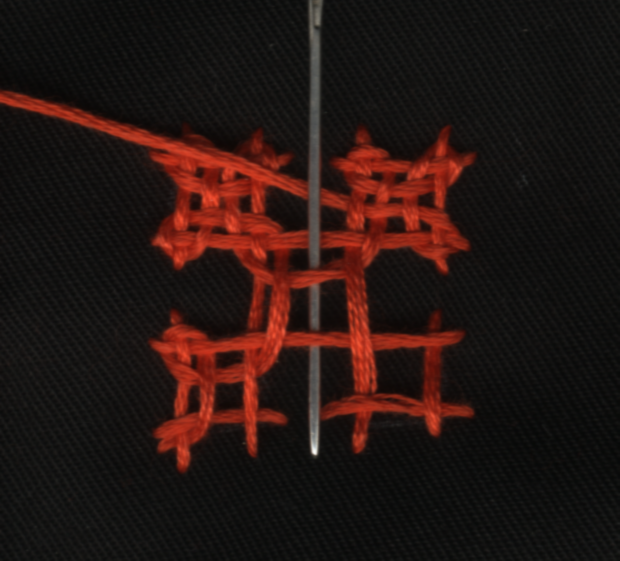
Under E (line B2 formed) over B (interlacing the intersection)
Under D (line E1 formed) over 9
Under 8 (around corner) over E
Under E1

Under C (line D1 formed) over 7
Under 6 (around corner) over D
Under D1
Under B (line C1 formed) over 5
Under 4 (corner) over C
Under C1 over E1
Under E over B (interlacing the intersection)
Interlacing of square II is complete. We’ll move on to square III through square V
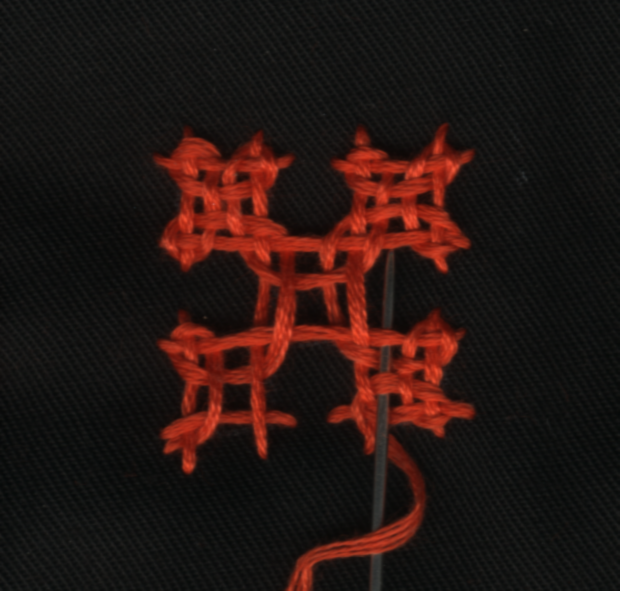
Under B1
Under H (line E2 formed) over E (interlacing the intersection)Under G (line H1 formed) over 15
Under 14 (around corner) over H
Under H1
Under F (line G1 formed) over 13
Under 12 (around corner) over G
Under G1
Under E (line F1 formed) over 11
Under 10 (around corner) over F
Under F1 (line E3 formed) over H1
Under H over E (interlacing the intersection)
Interlacing of square III is complete. We’ll move on to square IV through square V
Under E2
Under K over H (interlacing the intersection)
Under J (line K3 formed) over 21
Under 20 (around corner) over K
Under K1
Under I (line J1 formed) over 19
Under18 (around corner) over J
Under J1
Under K (line I1 formed) over 17
Under 16 (around corner) over I
Under I1 (line H3 formed) over K3
Under K over H (interlacing the intersection)
Interlacing of square IV is complete. We’ll move back to square I through square V.
Under H2 over B2 (interlacing the intersection)
Under B over K (we complete interlacing all intersection)
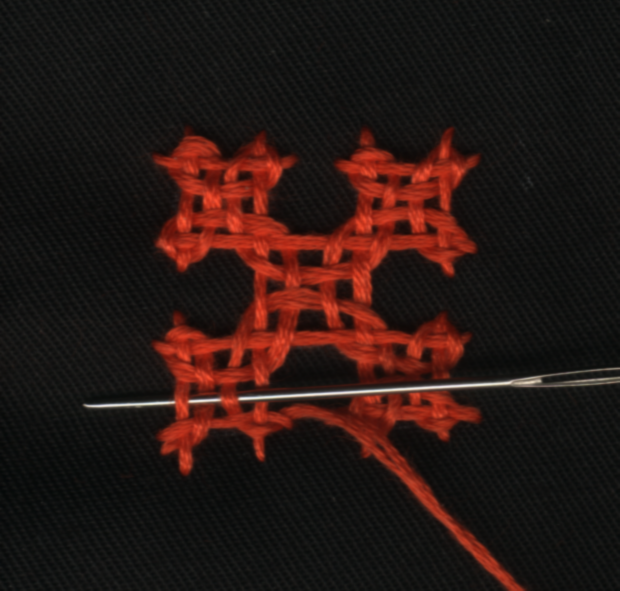
interlacing of square V complete
Under K1
Under A (line B3 formed) over 3
Under 2 (around corner) over B
Under B1 over L1
Under L over 1 (reached the lower left corner where the interlacing began)


The wrong side of fabric after completing the Maltese Cross.
The interlacing, like the skeleton or the foundation always ends at the starting point.
Points to remember:
1. Except at the starting point and at the end, the needle does not pierce the fabric - it only passes under or over previously laid thread.
2.Observe the lines in GroupA and Group B listed below.
Group A
A=I=1
A1 = I1 = 2
K1 = K3 = 3
K=4
K2 = 5
E2 = 6
E=7
E1= E3 = 8
C1 = G1 = 9
C=G=10
Similarly,
Group B
L=D=1
L1=D1=2
B1=B3=3
B=4
B2=5
H2= 6
H=7
H1=H3=8
F1=J1=9
F=J=10
In this motif, we can thus count upto 10 parallel lines in any direction.
The lines in the Group A are all Perpendicular to the lines in Group B
The odd numbered lines in Group A are under even numbered lines in group B
and even numbered lines in Group A are over odd numbered lines in group B.
From here on, if you have clearly understood the instructions, Kutchwork is very simple because we merely move from square to square building up on the Maltese Cross.
All patterns are but variations of the Maltese Cross and the Basic Diamond or combinations of both.
If my instructions are more confusing than instructive, I would like to know.
Note: My Full Tutorial of Kutch Is Taken From KUTCHWORK TUTORIAL
No comments:
Post a Comment